
Singer 7258 Sewing Machine Manual: A Comprehensive Guide
This guide offers detailed instructions for the Singer 7258‚ covering setup‚ operation‚ maintenance‚ and troubleshooting․ Available in PDF format‚ it supports users with 84 pages of information․
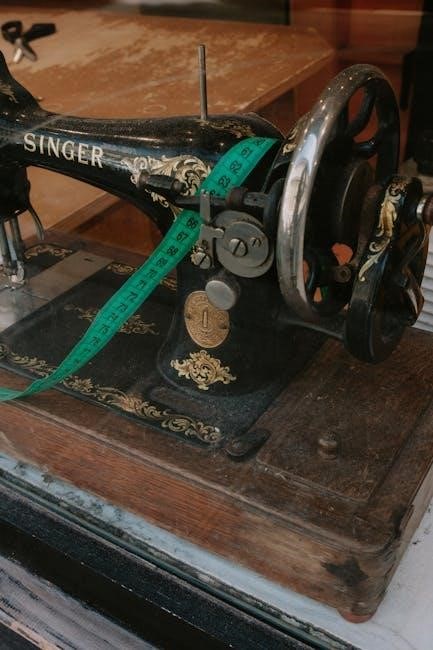
The Singer 7258 Stylist sewing machine is a popular choice for both beginners and experienced sewers‚ known for its reliability and versatile features․ This manual serves as a comprehensive resource to help you unlock the full potential of your machine․ It details everything from initial setup to advanced techniques‚ ensuring a smooth and enjoyable sewing experience․
This model boasts a range of stitch options and user-friendly controls‚ making it suitable for a variety of projects – from simple alterations to complex garment construction․ The 84-page guide‚ available as a PDF‚ provides step-by-step instructions‚ diagrams‚ and troubleshooting tips․ Whether you’re a novice learning the basics or a seasoned seamstress seeking to refine your skills‚ this manual will be an invaluable companion․ It’s designed to empower you to create beautiful and lasting projects with confidence․
Machine Features Overview
The Singer 7258 Stylist is packed with features designed for convenience and creative expression․ Key highlights include 100 built-in stitches‚ offering versatility for diverse projects‚ from basic seams to decorative embellishments․ An automatic needle threader simplifies a traditionally tedious task‚ saving time and frustration․
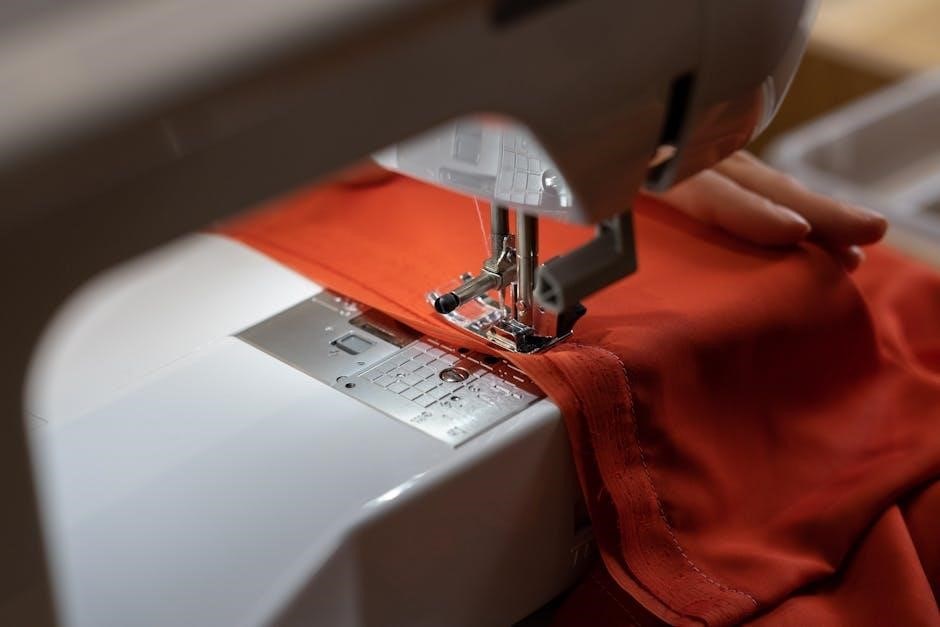
Adjustable stitch length and width provide precise control over your sewing‚ while the top drop-in bobbin ensures easy bobbin changes and clear visibility․ The machine also features a free arm for sewing cuffs‚ sleeves‚ and other cylindrical shapes․ Furthermore‚ the robust motor handles a variety of fabrics with ease․ This manual details each feature‚ explaining its function and how to optimize its use for achieving professional-quality results․ Explore the possibilities and unleash your creativity with the Singer 7258!
Unboxing and Initial Setup
Upon receiving your Singer 7258‚ carefully inspect the box for any damage during shipping․ Once opened‚ verify all included accessories are present: the power cord‚ foot pedal‚ assorted presser feet‚ bobbins‚ needle set‚ screwdriver‚ seam ripper‚ and the instruction manual itself․

Initial setup involves attaching the power cord and foot pedal to the machine․ Ensure the machine is placed on a stable‚ level surface․ Next‚ install a needle appropriate for your fabric type․ Familiarize yourself with the bobbin winding and insertion process – a crucial first step․ Refer to the manual’s diagrams for clear guidance․ Finally‚ perform a test sew on scrap fabric to confirm proper threading and tension․ Following these steps will ensure a smooth and successful start to your sewing journey with the Singer 7258․
Understanding the Machine Components
This section details the Singer 7258’s key parts‚ including the needle‚ presser foot‚ bobbin case‚ and thread path․ Proper identification is vital for operation․
Identifying Key Parts
Familiarizing yourself with the Singer 7258’s components is crucial for successful sewing․ The needle‚ responsible for stitch formation‚ requires correct insertion and frequent checks for damage․ The presser foot applies pressure to the fabric‚ ensuring even feeding; different feet are available for specialized tasks․
The bobbin case houses the lower thread‚ working in conjunction with the upper thread to create the stitch․ Understanding its mechanism is key to proper winding and insertion․ The thread path guides the thread from the spool to the needle‚ and following it correctly prevents threading errors․ Other important parts include the handwheel for manual control‚ the stitch selection dial‚ and the tension dials for adjusting thread tension․ Refer to the manual’s diagrams for precise locations and functions of each part․
Bobbin Winding and Insertion
Proper bobbin winding is essential for consistent stitch quality on your Singer 7258․ Begin by placing the thread spool on the spool pin and guiding the thread through the designated tension disc․ Next‚ thread the bobbin according to the manual’s diagram‚ ensuring it’s securely placed on the bobbin winder spindle․
Engage the bobbin winder and allow it to fill the bobbin evenly‚ stopping when full․ Bobbin insertion varies slightly depending on the model‚ but generally involves placing the wound bobbin into the bobbin case‚ guiding the thread through the tension spring‚ and ensuring it clicks into place․ Incorrect insertion can cause skipped stitches or thread bunching․ Always refer to the manual’s illustrations for the correct winding and insertion procedure specific to your Singer 7258․
Thread Path Guide
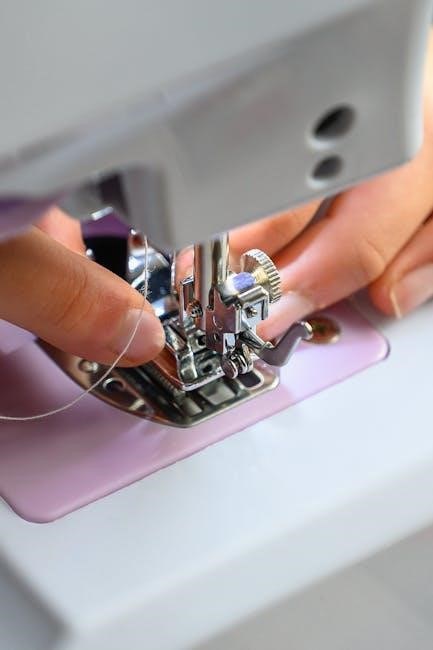
Correct threading is crucial for the Singer 7258’s operation; Begin by raising the presser foot; this opens the tension discs․ Guide the thread from the spool‚ through the first thread guide‚ and down to the tension discs‚ ensuring it seats properly between them․ Continue threading through the take-up lever‚ following the numbered path indicated in your manual․
Next‚ thread the needle from front to back․ Incorrect threading can lead to tension issues‚ skipped stitches‚ and thread breakage․ Always double-check that the thread is securely seated in each guide and tension point․ The manual provides detailed diagrams illustrating the precise thread path for various sewing applications․ Refer to these diagrams frequently‚ especially when changing thread types or experiencing threading difficulties․ A properly threaded machine ensures smooth and reliable sewing․
Basic Sewing Operations
Mastering fundamental techniques like threading‚ stitch selection‚ and length/width adjustments are key․ Practice on scrap fabric to build confidence with your Singer 7258․
Threading the Machine
Proper threading is crucial for optimal Singer 7258 performance․ Begin by ensuring the machine is turned off and the presser foot is raised․ Guide the thread from the spool pin‚ through the first thread guide‚ and then down to the tension disc – ensuring it seats firmly between the discs․
Next‚ follow the numbered threading path indicated on the machine‚ typically involving additional thread guides and the take-up lever․ Carefully thread the needle from front to back (consult your manual for specific needle threading instructions)․ Finally‚ draw up a sufficient length of thread through the needle‚ approximately 4-6 inches‚ and pull it under the presser foot․
Incorrect threading can lead to skipped stitches‚ thread breakage‚ or tension issues․ Refer to the detailed diagrams in the Singer 7258 manual for a visual guide․ Always double-check each step to guarantee correct thread placement․
Selecting Stitch Patterns
The Singer 7258 boasts a variety of stitch patterns for diverse sewing projects․ To select a stitch‚ locate the stitch selection dial on the machine․ This dial features a chart displaying available stitches‚ often including straight stitch‚ zigzag‚ buttonhole‚ and decorative options․
Rotate the dial until the desired stitch number or symbol aligns with the indicator mark․ Once selected‚ verify the stitch appears correctly on the stitch preview window (if equipped)․ Experiment with different stitches on scrap fabric to understand their function and appearance before starting your project․
Remember that certain stitches may require specific presser feet for optimal results․ The manual details which presser foot is recommended for each stitch pattern․ Understanding stitch selection expands your creative possibilities with the Singer 7258․
Adjusting Stitch Length and Width
Precise control over stitch length and width is crucial for achieving professional sewing results with the Singer 7258․ Locate the stitch length dial‚ typically marked with measurements in millimeters․ Rotating this dial adjusts the length of each stitch – shorter for delicate fabrics‚ longer for heavier materials․
Similarly‚ the stitch width dial controls the side-to-side deviation of stitches like zigzag․ Increasing the width creates a broader stitch‚ while decreasing it narrows the stitch․ Always test adjustments on scrap fabric to ensure the desired effect before sewing your project․
Refer to the manual for recommended settings based on fabric type and stitch selection․ Proper adjustment ensures fabric integrity and a polished finish․ Mastering these controls unlocks the full potential of your Singer 7258․
Practice Sewing Techniques
Before embarking on complex projects with your Singer 7258‚ dedicate time to practicing fundamental sewing techniques․ Start with straight stitching on scrap fabric‚ focusing on maintaining a consistent seam allowance․ Experiment with different stitch lengths and widths to observe their impact on fabric appearance and strength․
Next‚ practice pivoting – lifting the presser foot while the needle is down to change direction smoothly․ Mastering curves and corners requires slow‚ controlled movements․ Utilize the reverse stitch function for secure backstitching at the beginning and end of seams․
Consistent practice builds muscle memory and confidence․ The Singer 7258 manual provides stitch guides; use these as a starting point‚ then personalize settings based on your fabric and desired outcome․ Don’t be afraid to experiment and learn from each stitch!

Advanced Features and Techniques
Explore the Singer 7258’s capabilities‚ including the automatic needle threader‚ adjustable presser foot‚ free motion quilting‚ and techniques for diverse fabrics․
Using the Automatic Needle Threader
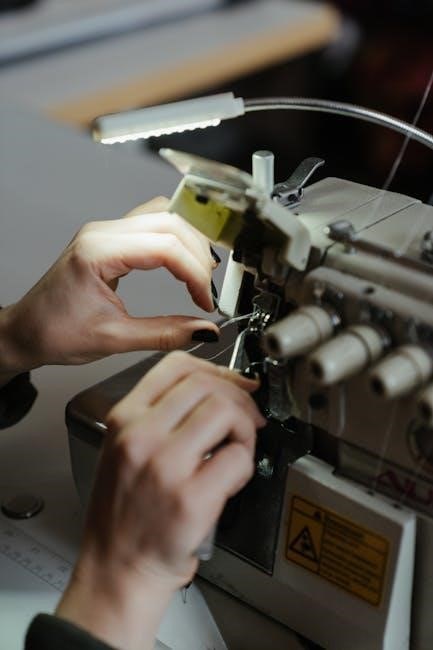
The Singer 7258 boasts a convenient automatic needle threader‚ simplifying a traditionally tedious task․ To utilize this feature‚ ensure the machine is turned off and the presser foot is raised․ Position the thread correctly into the designated guide‚ then gently lower the threader lever․
The threader will automatically guide the thread through the eye of the needle․ Once complete‚ lift the lever and carefully pull the thread ends to secure it․ This feature significantly reduces eye strain and saves time‚ especially for those with limited dexterity;
Always refer to the manual’s diagrams for precise thread placement‚ as incorrect positioning can prevent successful threading․ Regular use of the automatic threader enhances the sewing experience and promotes efficient workflow․ Practice makes perfect – familiarize yourself with the process for optimal results!
Adjusting Presser Foot Pressure
The Singer 7258 allows you to adjust the presser foot pressure‚ a crucial setting for achieving optimal stitch quality across various fabric types․ Lower pressure is ideal for delicate fabrics like silk or chiffon‚ preventing puckering and fabric damage․ Conversely‚ higher pressure is necessary for thicker materials such as denim or multiple layers․
To adjust‚ locate the pressure dial‚ typically found at the back of the machine․ Experiment with different settings using a scrap piece of fabric similar to your project material․ Observe how the fabric feeds through the machine; smooth‚ even feeding indicates correct pressure․
Incorrect pressure can lead to skipped stitches‚ uneven seams‚ or fabric distortion․ The manual provides a detailed chart suggesting appropriate pressure settings for common fabrics․ Mastering this adjustment unlocks greater control and professional-looking results with your Singer 7258․
Free Motion Quilting
The Singer 7258 excels in free motion quilting‚ enabling creative stitchwork and personalized designs․ This technique involves dropping the feed dogs – the teeth that normally advance the fabric – and manually moving the fabric under the needle․ The machine’s consistent power and adjustable speed are key to success․
To begin‚ attach the appropriate quilting foot (often a hopping foot)․ Lower the feed dogs using the designated lever․ Adjust the stitch length to zero․ Practice smooth‚ even movements‚ guiding the fabric with both hands․ A quilting glove can enhance control․
Experiment with different thread weights and needle sizes for varied effects․ The manual details recommended settings for free motion quilting․ Remember‚ practice is essential to develop a consistent rhythm and achieve beautiful‚ flowing designs with your Singer 7258․
Working with Different Fabrics
The Singer 7258 demonstrates versatility when handling diverse fabrics‚ from lightweight silks to heavier denims․ Successful sewing relies on proper needle and thread selection‚ alongside adjusted stitch settings․ The manual provides guidance for optimal configurations․
For delicate fabrics‚ utilize a fine needle (size 60/8 or 70/10) and a lightweight thread․ Reduce presser foot pressure to prevent puckering․ Conversely‚ heavier fabrics require a larger needle (size 90/14 or 100/16) and robust thread․ Increase presser foot pressure for better control․
Always test on a scrap piece of fabric before starting your project․ Adjust stitch length and tension as needed․ The 7258’s adjustable features allow for customized settings‚ ensuring clean‚ professional results across a wide range of materials․ Refer to the manual’s fabric guide for specific recommendations․
Maintenance and Troubleshooting
Regular cleaning and lubrication‚ as detailed in the manual‚ ensure optimal performance․ Troubleshooting common issues like thread jams is also clearly explained within its pages․
Cleaning the Machine
Maintaining a clean Singer 7258 sewing machine is crucial for its longevity and performance․ Dust‚ lint‚ and stray threads can accumulate within the machine‚ hindering smooth operation and potentially causing malfunctions․ The manual emphasizes regular cleaning‚ ideally after every eight hours of use‚ or more frequently with heavy use․
Begin by disconnecting the power supply․ Use a soft brush – often included with the machine – to remove loose debris from the bobbin area‚ feed dogs‚ and around the needle plate․ A lint brush or vacuum cleaner with a brush attachment can also be helpful․ For more stubborn lint‚ a small piece of fabric dampened with sewing machine oil can gently lift away the buildup․ Avoid using compressed air‚ as it can push debris further into the machine․
Pay close attention to the needle plate area‚ ensuring it’s free of thread fragments․ Regularly cleaning these areas prevents skipped stitches and ensures consistent fabric feeding․ The manual provides diagrams illustrating key cleaning points for the Singer 7258‚ making the process straightforward․
Oil Points and Lubrication
Proper lubrication is essential for the smooth functioning of your Singer 7258 sewing machine․ The manual details specific oil points that require periodic attention to minimize friction and wear․ Generally‚ lubrication should be performed after cleaning‚ or approximately every six months with regular use․
Key oiling points include the bobbin race‚ the hook assembly‚ and the motor shaft․ Use only sewing machine oil – never use oil intended for other purposes‚ as it could damage the machine’s components․ Apply a small drop of oil to each designated point‚ ensuring it reaches the moving parts․ Avoid over-oiling‚ as excess oil can attract dust and lint‚ creating a sticky residue․
The manual includes diagrams clearly illustrating the location of each oil point on the Singer 7258․ After oiling‚ run the machine briefly to distribute the oil evenly․ Wipe away any excess oil with a clean‚ lint-free cloth․ Consistent lubrication extends the machine’s lifespan and maintains optimal performance․
Troubleshooting Common Issues
The Singer 7258 manual provides solutions to frequently encountered problems․ Common issues include thread bunching‚ skipped stitches‚ and the machine stopping unexpectedly․ For thread bunching‚ re-threading the machine correctly and ensuring proper bobbin insertion are crucial first steps․
Skipped stitches often indicate a dull or incorrect needle size for the fabric being used․ Always replace the needle regularly․ If the machine stops‚ check the power cord‚ foot pedal connection‚ and ensure the presser foot is down․ The manual details specific error codes‚ if applicable‚ and their corresponding solutions․
Before seeking professional repair‚ consult the troubleshooting section․ It offers a systematic approach to diagnosing and resolving issues․ Remember to always unplug the machine before attempting any internal adjustments or repairs․ Following the manual’s guidance can save time and expense․
Replacing the Needle
The Singer 7258 manual emphasizes regular needle replacement for optimal sewing performance․ A dull or damaged needle can cause skipped stitches‚ fabric puckering‚ and even machine damage․ Always use the correct needle type and size for your fabric – the manual includes a helpful chart․
To replace the needle‚ ensure the machine is turned off and unplugged․ Loosen the needle clamp screw using the screwdriver provided․ Gently remove the old needle‚ and insert the new one with the flat side facing the back․ Tighten the screw securely‚ but avoid over-tightening․
Proper needle insertion is vital; it should be fully inserted into the needle clamp․ Discard used needles safely to prevent injury․ The manual recommends changing the needle after every eight hours of sewing or with each new project․ Following these guidelines ensures consistent stitch quality․

Accessing the Manual & Support
The Singer 7258 manual is available as a downloadable PDF․ Additionally‚ Singer’s official website provides extensive support‚ FAQs‚ and warranty details for assistance․
Downloading the Digital Manual (PDF)
Accessing the Singer 7258 sewing machine manual in digital PDF format is straightforward and provides a convenient way to have instructions readily available․ The manual spans 84 pages and offers comprehensive guidance on all aspects of the machine‚ from initial setup to advanced techniques and troubleshooting․
Users can easily download the PDF from various online resources‚ ensuring they always have the latest version at their fingertips․ Having a digital copy eliminates the need to carry a physical manual and allows for quick searching of specific topics or features․ This accessibility is particularly helpful when tackling new projects or resolving operational questions․ The PDF format ensures compatibility across various devices‚ including computers‚ tablets‚ and smartphones‚ making it a versatile resource for all Singer 7258 owners․
Singer’s Official Website for Support
For dedicated assistance with your Singer 7258 sewing machine‚ the official Singer website is an invaluable resource․ It provides a centralized hub for accessing support materials‚ including frequently asked questions (FAQs)‚ troubleshooting guides‚ and downloadable resources like the 84-page PDF manual․
The website often features instructional videos demonstrating key features and techniques‚ enhancing the learning experience․ Beyond the manual‚ users can find information on compatible accessories‚ warranty details‚ and authorized service centers․ Singer’s support team is also accessible through the website‚ offering direct assistance via online chat or email for more complex issues․ Regularly checking the official site ensures you have the most up-to-date information and solutions for maximizing your sewing experience with the Singer 7258․
Frequently Asked Questions (FAQ)
Many common questions regarding the Singer 7258 are addressed in readily available FAQs․ These cover topics like initial setup‚ threading issues‚ stitch selection‚ and basic maintenance․ Users frequently inquire about error codes‚ needle compatibility‚ and troubleshooting specific fabric types․
The 84-page manual itself often contains a dedicated FAQ section‚ but online resources expand upon this․ Common concerns include understanding the automatic needle threader‚ adjusting presser foot pressure‚ and resolving bobbin winding problems․ Finding answers to these frequently asked questions can often resolve issues quickly‚ avoiding the need for extensive troubleshooting or contacting customer support․ Online forums and communities dedicated to Singer sewing machines also provide user-generated FAQs and solutions․
Warranty Information
Singer sewing machines‚ including the 7258 model‚ typically come with a limited warranty․ This warranty generally covers defects in materials and workmanship for a specified period‚ often one year from the date of purchase․ It’s crucial to retain your proof of purchase – the receipt – as it’s required for any warranty claims․
The warranty usually doesn’t cover damage caused by misuse‚ accidents‚ or unauthorized repairs․ Regular maintenance‚ as outlined in the 7258’s manual‚ is the owner’s responsibility․ To initiate a warranty claim‚ you’ll likely need to contact Singer’s customer support directly‚ providing details of the issue and your purchase information․ Detailed warranty terms and conditions are available on Singer’s official website and often included as a separate document within the machine packaging․